
<aside class=""mb-2 ml-4 border-l-2 border-l-sky-700 pl-1""> <h1 class="text-base">This post is part of a series on improving this blog #recursion</h1> <div class="flex flex-row"> <div class="flex-grow"></div> <div class="flex-grow content-end"> Next Post </div> </div> </aside>
I recently had a conversation where I said that I couldn't build an AMP version of my blog because I use Github Pages to build and serve it. Github don't allow any Jekyll plugins to run.
Later that day my subconscious prompted me to realise that, since Github pages will serve static HTML quite happily, I could use Travis CI to build a Github repository that held the source for the blog and push the static output to a second repository that Github would publish as is.
Travis CI
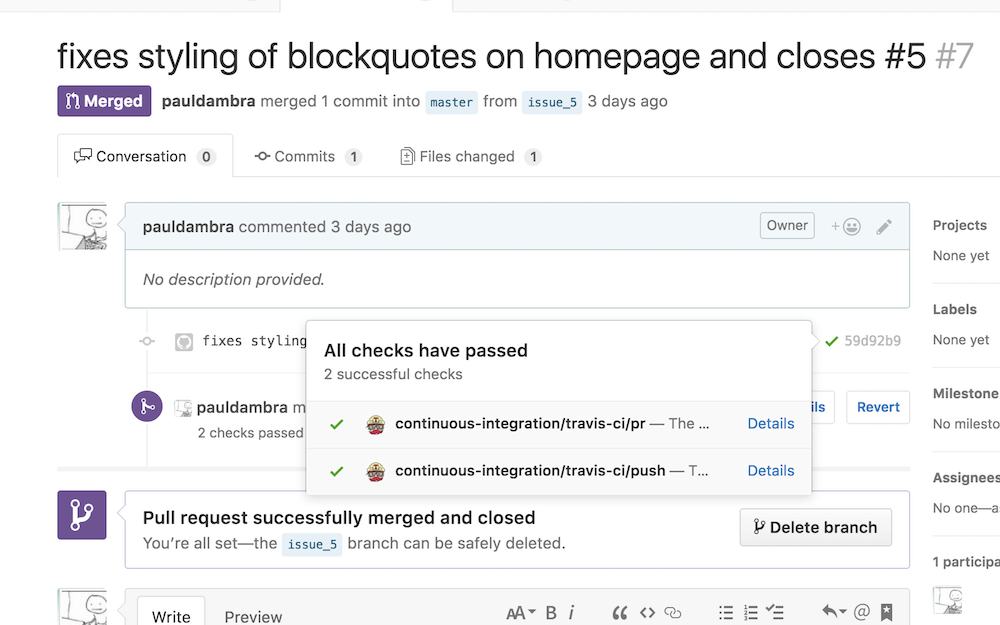
Travis is an online continuous integration system that hooks very neatly into Github. It's free for open source projects and adds build status to commits. It can be set to automatically build pull requests and adds output to those PRs so that people can see if it is safe to merge a request without building it locally themselves
Travis is configured by placing a YAML file in the root of the project. You can place commands directly into the config file but I prefer to put those commands in a script file - that way you can run them locally to confirm the steps should work before pushing the YAML file to Github for Travis to detect.
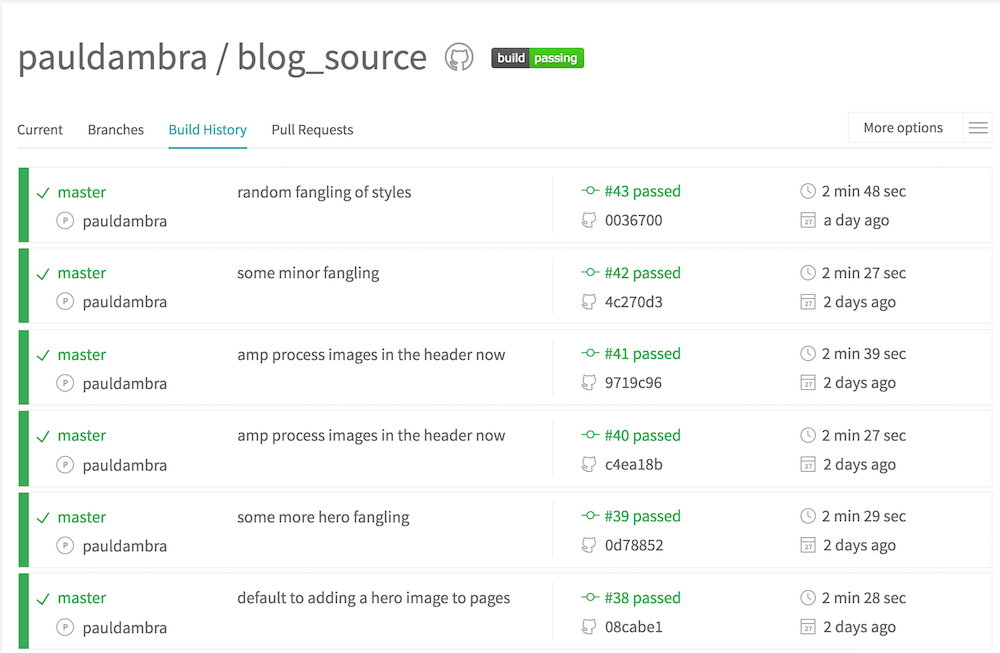
Continuous integration is the process of automating build and verification of your software. It's they way you avoid having to say "Works on my machine. ¯_(ツ)_/¯". I <3 CI so being able to fold it into my hobby workflow like this is super satisfying.
Desired outcome
I decided to have one repository called blog_source which would build the static site into a folder. And a second repository (the original one pauldambra.github.io) that would host the actual site. Previously I pushed the jekyll source to that repository for Github to build now I'll be pushing HTML for Github to host.
The process will be:
- git init the output repository in a known folder,
- pull the current state,
- write the new output over the top,
- commit those changes and push to the remote.
That push makes any changes visible in short order online.
I was introduced to this "release repository" mechanism for deploying code in a previous job. It is particularly effective for projects that build some static output that can be run as-is like this static HTML site or a NodeJS project after transpilation.
You can extend it nicely by pushing a version that can be hosted in a CI environment and have acceptance tests run against it. Which, if they pass, cause that version to be tagged in the git repository allowing it to be used further down your deployment pipeline.
Initial steps
#! /bin/bash

set -e

DEPLOY_REPO="https://${DEPLOY_BLOG_TOKEN}@github.com/pauldambra/pauldambra.github.io.git"

function main {
	clean
	get_current_site
	build_site
}

function clean {
	echo "cleaning _site folder"
	if [ -d "_site" ]; then rm -Rf _site; fi
}

function get_current_site {
	echo "getting latest site"
	git clone --depth 1 $DEPLOY_REPO _site
}

function build_site {
	echo "building site"
	bundle exec jekyll build
}

main
These first steps are relatively straightforward.
- if the output folder exists delete it
- then clone the latest revision of the output repository into it
- finally run the jekyll build
- I'm accepting the default output location of _site to simplify things
The only 'complicated' bit here is the DEPLOY_BLOG_TOKEN environment variable that is being used to authenticate against Github.
Github Personal Access Tokens
Personal access tokens act in-place of passwords for github resources. You can limit what permissions those tokens have. Generating different tokens for different uses so you can delete them if you suspect they have been compromised.
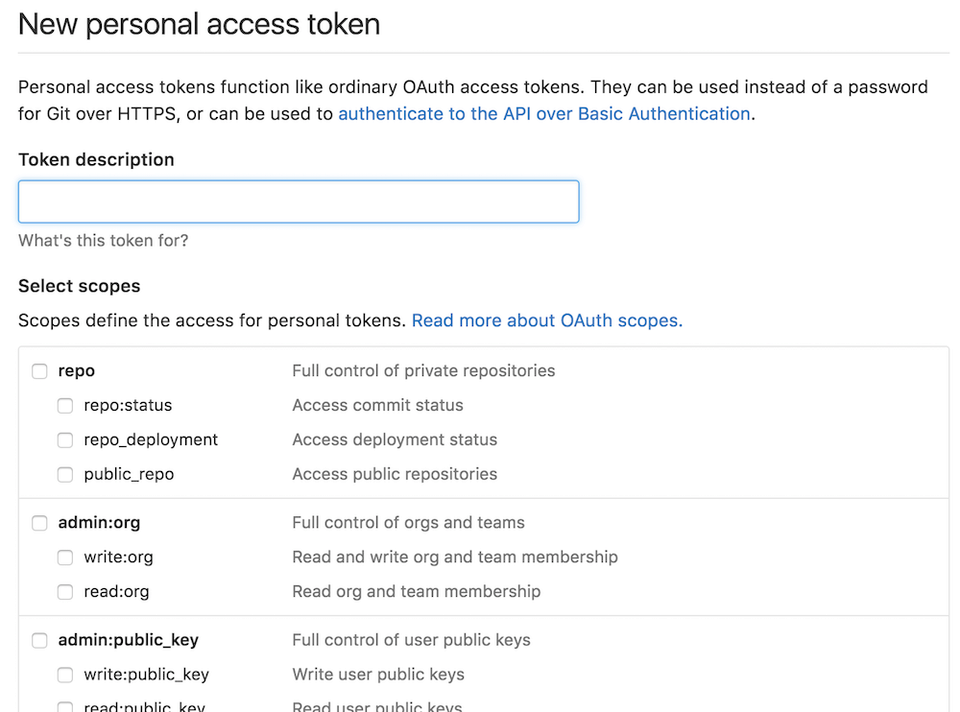
Since they act like passwords you should be very careful with them… Travis allows you to encrypt variables before adding them to the .travis.yml file so that secure information doesn't need to be committed into the repository or stored in plain text by the CI system.
The Travis CLI encrypts the key in the context of the repository in which Travis is going to run so that it can only be decrypted in that context.
This secure variable will be used in the blog_source build so that's the encryption context.
travis encrypt DEPLOY_BLOG_TOKEN=SOME_SECRET_VALUE -r pauldambra/blog_source --add
Here we provide the name that should be available in Travis and its value. With -r specify the repository context to operate in and with --add instruct the CLI to add the token to the .travis.yml file.
The .travis.yml file
The definition for the Travis YAML is online. It lets you define the build environment and what commands will be run at each stage of the lifecycle of your travis jobs.
language: ruby
cache: bundler
install:
  - bundle install
script:
  - "./build.sh"
env:
  global:
    secure: aGrEaTbIgLoNgEnCrYpTeDvAlUe
Here we tell Travis that
- this is a Ruby project
- to cache the bundler output (most of the run turns out to be building nokogiri)
- that the install setup is to run
bundle install - that the build step is to run
./build.sh - and finally to add the secure variable to the environment.
Deploying the built output
The final step in the script is to push the changed code to the output repository, when we're on master and not in a pull request.
function deploy {
	echo "deploying changes"

	if [ -z "$TRAVIS_PULL_REQUEST" ]; then
	    echo "except don't publish site for pull requests"
	    exit 0
	fi

	if [ "$TRAVIS_BRANCH" != "master" ]; then
	    echo "except we should only publish the master branch. stopping here"
	    exit 0
	fi

	cd _site
	git config --global user.name "Travis CI"
    git config --global user.email paul.dambra+travis@gmail.com
	git add -A
	git status
	git commit -m "Lastest site built on successful travis build $TRAVIS_BUILD_NUMBER auto-pushed to github"
	git push $DEPLOY_REPO master:master
}
Travis adds several convenience environment variables two of which which can be checked here to confirm that we don't want to deploy pull requests or branches other than master.
Then the script ensures that the commit is identified and has a message that can be tracked back to this Travis build. Before pushing to Github.
Finally
This process turned out to be straightforward and Travis is a joy to work with. Next up it's time to add some plugins to the site so that an AMP version can be published